• Skip to content
  • Skip to primary sidebar
  • Skip to footer

Sea Sky & Table

a travel company exploring the intersection between people, food and and the world we live in

  • Home
  • Travel
    • Travel Imagery
  • Food
    • Recipes
    • Food Imagery
    • Food Videos
  • Architecture
    • Galleries: Real Estate
    • Homeowner Guidelines
    • Galleries: Commercial
    • Houzz Profile
    • Terms & Conditions
  • Blog
  • About
You are here: Home / Archives for french cuisine

french cuisine

Chocolate Pot de Crème for Two

May 16, 2017


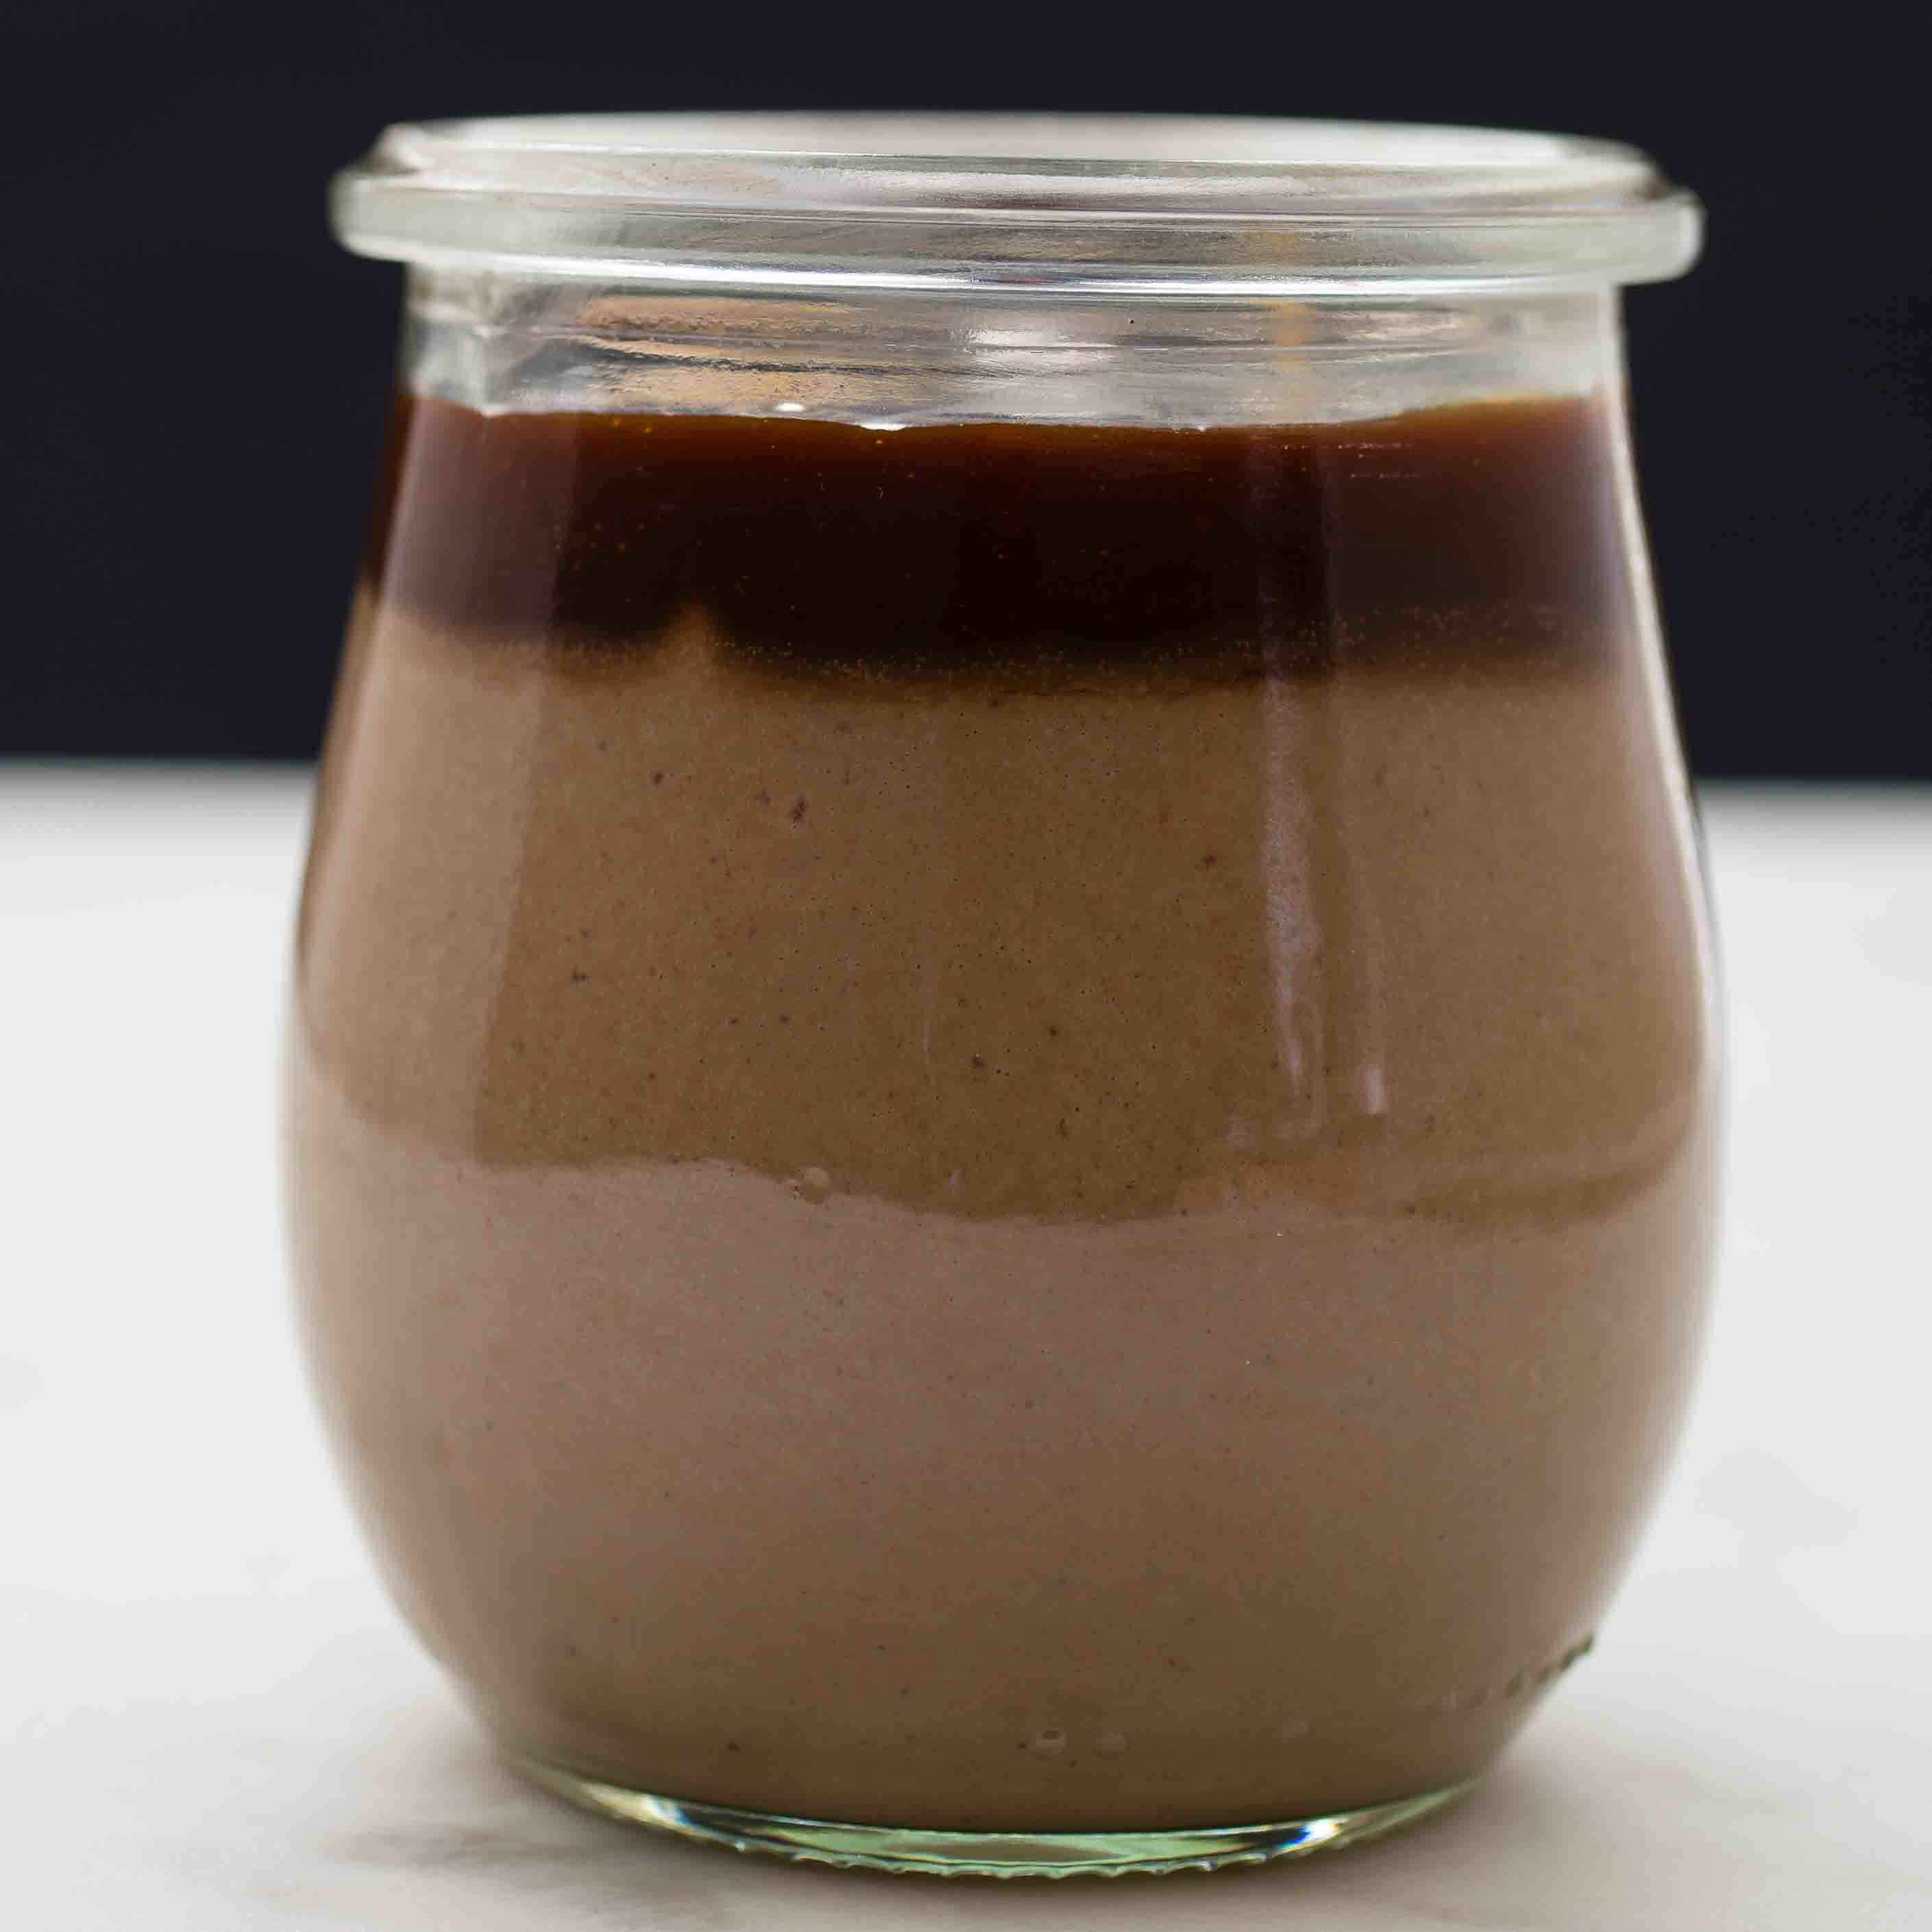
So many recipes are designed for a large family or small dinner party. As the nest empties – or before it grows – here is an easy recipe for Chocolate Pot de Crème for two adapted from Paris: Authentic Recipes Celebrating the Foods of the World from the Williams Sonoma collection.

Chocolate Pot de Creme for Two
2016-08-02 05:30:50
An easy recipe for Chocolate Pot de Crème, tailored for two servings. Top it with a thin layer of salted butter caramel (see post of same date) and a dollop of whipped cream.
Write a review
Save Recipe
Print
Ingredients
  1. 1/3 c. milk
  2. 1/4 c. cream
  3. 1/4 c. sugar (omit if using a sweetened chocolate like Chocolat-Menier)
  4. 2 oz best quality bittersweet chocolate, chopped into small pieces
  5. 1/2 tbsp. unsweetened cocoa powder
  6. tiny pinch of salt (think 1/4 of a pinch used for the version that serves 8)
  7. 1 whole egg, whisked
  8. 1/4 tsp. vanilla
  9. heavy cream or whipped cream for garnish
Instructions
  1. Preheat the oven to 350 degrees.
  2. Place a kettle of water to boil for the bain marie.
  3. In a heavy saucepan, over low heat, combine the milk, cream and sugar and stir until bubbles form at the edges.
  4. Remove from heat and stir in both chocolates and the salt and stir until smooth.
  5. Return to medium heat and stir constantly until small bubbles form at the edges (approximately 3-4 minutes).
  6. Remove from heat.
  7. in a separate bowl containing the whisked egg, whisk a few spoonfuls of the chocolate mixture to temper the egg without cooking it. Whisk in a few more spoonfuls, then slowly pour and whisk the egg mixture back into the saucepan with the chocolate mixture. Stir in the vanilla.
  8. Pour the mixture into two 3-1/2-inch ramekins, filling them almost to the top.
  9. Place the ramekins in a brownie pan and surround the ramekins with hot water from the kettle. Cover the pan with aluminum foil.
  10. Bake until the edges are firm but the centers tremble slightly (or until a thin knife inserted in the center comes out clean).
  11. Remove from the water bath, cool, wrap, and refrigerate fro 2 hours or 2 days.
  12. Serve cold. Garnish with whipped cream or just create a tiny well in the center with a knife and pour a splash of heavy cream into the center.
Notes
  1. In a pinch, I have substituted evaporated milk for the cream and been quite pleased with the results. We often use Chocolate Menier, a bar brand used for making hot chocolate, because it's what we have in the house; and Ghiradelli cocoa powder.
Adapted from Williams Sonoma's Paris
Sea Sky & Table https://seaskyandtable.com/

Filed Under: Food, Recipes: Sweet Tagged With: chocolate, custard, dessert, food, french cuisine, pot de creme, sweet

Madeleines

December 10, 2015

1777_2015-12-09_Madeleines_Blog, Featured

This is the easiest madeleine recipe yet! Lovely and lemony, it is as Larousse on Pastry promised, child’s play.

Madeleines
2016-07-30 17:03:28
Yields 12
The original recipe calls for 2/3 cup sugar, but you can reduce it to as little as 1/3 cup. For a slight variation, add 1/2 tsp almond extract.
Write a review
Save Recipe
Print
Prep Time
10 min
Cook Time
15 min
Prep Time
10 min
Cook Time
15 min
Ingredients
  1. 1 c. flour
  2. 1 tsp. baking power
  3. 7 tbsp. butter
  4. Zest of 1/4 lemon
  5. 2 eggs
  6. 2/3 c. sugar (or as little as 1/3 c.)
Instructions
  1. Preheat oven to 425 degrees.
  2. Lightly butter a 12-madeleine pan mold (for regular, not mini-madeleines).
  3. Sift the four and baking powder into a bowl.
  4. Melt the butter in a small saucepan and allow to cool.
  5. Beat the eggs 1 minute. Add the sugar and beat 4 more minutes. (They should be very frothy.)
  6. Add the flour and baking powder, then the butter and lemon zest, stirring constantly.
  7. Fill each madeleine mold to 2/3 full.
  8. Bake for 5 min @ 425 degrees, then lower to 400 degrees and bake for 10 minutes longer.
  9. Turn out the madeleines while still warm and allow them to cool.
By Larousse
Adapted from Larousse on Pastry
Sea Sky & Table https://seaskyandtable.com/

Filed Under: Food, Recipes: Sweet Tagged With: cookie, dessert, food, french cuisine, madeleines, madelines, sweet

Le Gateau Weekend

August 13, 2015

9520_Bay Leaf Pound Cake

      Crossing the San Francisco Bay Bridge for the first time, in a convertible with the top town, the scent was mesmerizing. “What is that smell,” I kept asking.

       “What smell?”

       “That smell, in the breeze. What is it? I know that smell.”

       Thank goodness I wasn’t driving, it was so distracting. Craning my neck out the passenger side window of the red Mustang convertible, hungry for more, my brain tried to connect identifiable memory with what my olfactory senses were inhaling, deeply. I knew that smell. It was so familiar. The synapse eluded me.

       The Bay Bridge is a long bridge. By the time we reached the end, my companion’s amusement at my inadvertent bloodhound imitation was waxing. As we approached terra firma, the scent surrounded us. My eyes closed, still searching memory banks.

       “What kind of tree is that?”  We were on solid ground now and huge, ginormous trees I had never seen before were breezing past us. Their perfume filled the air with subtle, earthy well-being.

       “Bay Leaf.”

       “That’s it! Bay leaf! We use it in beans and stews all the time. Holy moly! Those leaves are huge! No wonder Williams Sonoma was inspired to create such beautiful wreaths. They’re massive! Those are not the bay leaves we get at the supermarket. I never knew what they smelled like fresh.”

       “Mmmm.”

       Sitting back to relax against the convertible’s bucket seat, I closed my eyes again, allowing the scent to waft over me. When I opened my eyes, we were in wine country.

       Years later, reading David Lebovitz’ My Paris Kitchen: Recipes and Stories, I am once again mesmerized by the fragrance of bay leaf. Humble store-bought bay leaves are infused in the butter used to keep this pound cake moist. A few perfect leaves are buttered on one side and arranged on parchment paper to decorate the bottom of the loaf. Pound cake usually rises, though, and it would be a shame to level the top to serve it upside-down. Standing a leaf on its edge in the batter down the center identifies this heady beauty as something to talk about. Voila!

       It’s been 3 days since I baked what DL calls his gateau week-end.  I still smile when I bump into its subtle and mysterious fragrance.


Filed Under: Food, Recipes: Sweet Tagged With: bay leaf, cake, California, David Leibovitz' My Paris Kitchen, dessert, food, french cuisine, pound cake, sweet

Individual Chocolate Souffles

August 5, 2015


Simple and quick to prepare, these individual chocolate souffles, adapted from Irma Rombauer’s classic Joy of Cooking, are certain to delight. See the notes in the variation for tips on a recipe for two.

Individual Chocolate Souffles
2016-08-01 14:24:17
Serves 6
Souffles once intimated me. Not any more! These are quick and easy with ingredients that are in our kitchen on a regular basis. The original recipe called for rum, coffee or water for flavoring. I like to use rioja wine or cranberry juice.
Write a review
Save Recipe
Print
Cook Time
20 min
Cook Time
20 min
Ingredients
  1. 8 oz semisweet or bittersweet chocolate, chopped
  2. 4 tblsp (1/2 stick) unsalted butter
  3. 2 tblsp rioja wine, cranberry juice, rum, or coffee or water
  4. 6 large egg yolks
  5. 6 large egg whites, at room temperature
  6. Heaping 1/4 teaspoon cream of tartar
  7. 1/2 c sugar
Instructions
  1. Preheat oven to 375 degrees.
  2. Butter and sugar six 10- to 11-ounce ramekins and arrange on a baking sheet.
  3. Combine in a heatproof bowl: chocolate, butter, flavoring.
  4. Set the bowl in a skillet of hot (but not simmering water) and stir until the mixture is smooth. Let cool for 10 minutes, then...
  5. Whisk in egg yolks.
  6. Separately, in a mixer, beat the egg whites until foamy.
  7. Add the cream of tartar to the egg whiles and beat at high speed until soft peaks form.
  8. Gradually beat in the sugar and beat until the peaks are stiff but not dry.
  9. Using a large rubber spatula, stir one-third of the egg whites into the chocolate mixture, then gently fold in the remaining mixture.
  10. Divide the batter equally among the prepared ramekins and smooth the tops.
  11. Bake until risen and set, about 20 minutes.
  12. Optional: After bringing the souffles to the table, cut a slit in the top and drop a dollop of whipped cream on top.
Notes
  1. SWEET ENOUGH FOR TWO: Break out the electric hand mixer with a whisk attachment, butter and sugar two 3-1/2-inch ramekins, and follow the instructions above with these measurements: 1 egg; 1 tbsp. butter; 1 tbsp. sugar; 1-1/6 oz dark chocolate; pinch of cream of tartar; 1/4 tbsp. prepared coffee, red wine, or cranberry juice.
Adapted from The Joy of Cooking
Sea Sky & Table https://seaskyandtable.com/

Filed Under: Food, Recipes: Sweet Tagged With: chocolate, dessert, food, french cuisine, souffle, sweet

Cherry Clafoutis

August 1, 2015

9251_Cherry Clafoutis

When cherries are in season, this is my go-to dessert. Whether it’s presented in individual ramekins or family style in a baking dish, it always tastes like summer.  Adapted from Larousse on Pastry.

Cherry Clafoutis
2016-08-01 14:42:15
Serve warm in ramekins while the custard still has a little height to it; or cold any time from the baking dish.
Write a review
Save Recipe
Print
Ingredients
  1. 1 lb. black cherries
  2. 1/3 c. sugar
  3. 1 c. flour
  4. A pinch of salt
  5. 3 eggs
  6. 1-1/4 c. milk
  7. Butter for the mold(s)
Instructions
  1. Preheat the oven to 350 degrees. Butter a 10-1/2 inch baking dish or 8 individual ramekins (1/2 cup capacity).
  2. Wash the cherries and remove the stems. Slice each in half and remove the pits. Place them in a bowl, sprinkle with half the sugar, and stir to distribute the sugar evenly. Set aside for 30 minutes.
  3. Sift the flour into a bowl, add a pinch of salt and the rest of the sugar. Beat the eggs and add them to the mixture. Mix well. Add the milk and mix again.
  4. Lay the cherries in a baking dish, pour the batter over them and bake until a toothpick inserted in the center comes out clean. If using ramekins, this will take approximately 25 to 30 minutes. If using a baking dish, approximately 35 to 40 minutes.
  5. Remove from the oven and allow to cool slightly.
Notes
  1. The custard will pouf up in the oven and deflate quickly (i.e., in the time it took me to remove the ramekins from the oven and take a few pictures), but don't worry, it's not a soufflé, it's supposed to settle a bit.
  2. The Larousse recipe calls for confectioners' sugar sprinkled on top, and I keep trying it because I get the impression it's more authentic, but the conclusion is always the same - clafoutis is sweet enough on its own. If anything, add a small dollop of whipped cream, or drizzle a tiny bit of Beaujolais Syrup on top.
Adapted from Larousse on Pastry
Sea Sky & Table https://seaskyandtable.com/

Filed Under: Food, Recipes: Sweet Tagged With: cherries, cherry, dessert, food, french cuisine, fruit, sweet

Pear Bardaloue

July 15, 2014

6655_2013-01-06_Pear Tart (Bardaloue)_Blog2_Blog, Featured


My Dad loved pears.  I had made this tart for him a few years ago and had purchased the ingredients to make it for him again over the winter break of 2012. He passed away that Thanksgiving weekend. Over the holidays, I made it in his honor and invited the local branch of our family to share it. They loved it, and I know Dad would have, too.  Adapted from Larousse on Pastry.

Pear Bardaloue
2016-08-01 14:11:49
Easier than you might think and absolutely gorgeous. This fragrant dessert is redolent of pears, almonds, autumn, and good friends.
Write a review
Save Recipe
Print
Ingredients
  1. TART SHELL
  2. ==========
  3. 7 tbsp. butter
  4. 1-1/4 c. sifted flour
  5. A pinch of salt
  6. 2 tbsp.. sugar
  7. 5 tbsp. ice cold water
  8. ALMOND CREAM
  9. ==============
  10. 1/4 c. butter
  11. 1 small egg
  12. 5 tbsp. sugar
  13. 7/8 c. ground almonds
  14. PEARS
  15. ======
  16. 10 to 12 canned pear halves (about 4 cans)
Instructions
  1. PREPARE THE CRUST: Cut the butter into very small pieces. Put the flour in a bowl and make a well in the center. Add the salt, the sugar, and the butter. Quickly rub in the ingredients with your fingertips. Add some water to form a dough. Knead until supple. (It should be neither too sticky, nor too soft.) Dust your work surface with flour, lay the dough on it and flatten it with the heel of your hand. (Do not knead at this stage.) Shape the dough into a ball, wrap in plastic wrap and allow to rest for at least 30 minutes.
  2. WHILE THE DOUGH IS RESTING: Cut the butter for the almond cream into pieces and allow to soften at room temperature.
  3. Drain the pears and cut lengthwise into thin slices.
  4. Preheat the oven to 375 degrees.
  5. PREPARE THE ALMOND CREAM: Break the egg into a bowl, add the butter and sugar and beat by hand until you obtain a smooth cream. Beat in the ground almonds.
  6. Roll out the dough and place in a 9-inch tart shell Pour in the almond cream. Arrange the pear slices on top.
  7. Bake for 30 minutes.
  8. Allow to cool slightly before turning out.
  9. Serve cold or at room temperature.
Notes
  1. This pastry crust is best when created by hand (not in a food processor). If you are pressed for time or just don't want to work the dough with your hands, try the Pate Brisee recipe elsewhere on this site.
  2. If the tart has cooked for 30 minutes and a toothpick inserted in the center comes out clean - but the almond cream filling is not golden brown - try sprinkling a little sugar on the cream (not the pears) and using a crème brullee torch - very lightly and briefly - to brown the top.
Adapted from Larousse on Pastry
Sea Sky & Table https://seaskyandtable.com/

Filed Under: Food, Recipes: Sweet Tagged With: almond, autumn, baking, bardaloue, dessert, food, french cuisine, pears, sweet, tart

Pate Brisèe au Sucre

July 8, 2014

8634_2015-07-08_Tart Pans_Blog, Featured

This recipe is adapted from French Tarts: 50 Savory and Sweet Recipes by Linda Dannenberg.  I found it at William Sonoma, loved it, and proceeded to test every recipe on my loving and appreciative parents.  It’s great for fruit tarts and travels well.

Pâte Brisée au Sucre
2016-08-01 13:53:26
Serves 8
The milk and sugar in this recipe make a sweeter, flakier version of the classic pâte brisée which is great for fruit tarts. This version uses less sugar (1/3 cup instead of 1/2 cup) and less than the full 1/4 tsp. salt.
Write a review
Save Recipe
Print
Prep Time
1 hr 30 min
Cook Time
20 min
Prep Time
1 hr 30 min
Cook Time
20 min
Ingredients
  1. 1 1/2 c. all-purpose flour
  2. 1 stick (4 oz) unsalted butter, very cold
  3. 1/8 to 1/4 tsp. salt
  4. 1/8 tsp. baking powder
  5. 1/3 c. sugar
  6. 4 tbsp. (1/4 c.) ice cold milk
Instructions
  1. Cut the butter into 7-8 pieces.
  2. Place all the ingredients except the milk in a food processor fitted with the steel blade.
  3. Process until mixture has the consistency of coarse meal (5 – 10 seconds).
  4. With the machine running, pour the milk through the feed tube one tablespoon at a time in a steady stream. Stop processing before the dough forms a ball to ensure tender, flaky pastry.
  5. From the pastry into a flat (1- to 1-1/2" high) disk.
  6. Wrap the disk in plastic and refrigerate at least one hour.
  7. Roll out & arrange in tart pan.
  8. Cover with plastic wrap and refrigerate for another hour.
  9. Preheat oven to 375 degrees.
  10. For a partially-baked tart shell, Bake 8 minutes in the center of the oven. Remove weights and foil and bake for 2 more minutes.
  11. For a fully baked shell, Bake 8 minutes, remove foil and weights, then bake for 15 to 20 minutes, until light golden brown all over.
  12. Cool on a wire rack before filling.
Notes
  1. TIPS
  2. Makes one large tart shell; or 1 small shell and 2-3 tartlets; or 8 tartlets.
  3. In a warm climate (or during the summer), when it’s difficult to keep things cold, try keeping butter frozen. Use a strong knife with a wide blade to cut it into pieces.
  4. Un-rolled pastry can be frozen. Remove from food processor, flatten into a disk about ½” to 1 “ high, enclose in plastic wrap, and let it rest in the refrigerator for about 20 minutes before freezing. When ready to roll, place pastry in a second plastic bag in the refrigerator to defrost for 1-2 hours before rolling. The second bag captures condensation, protecting the dough from becoming soggy.
  5. Once pastry is arranged in the shell, press the rolling pin across the top to achieve a perfect edge.
  6. Before placing in the oven, pierce the shell with a fork 2-3 times, cover with foil, and place pie weights (or beans) on the foil to keep the pastry from bubbling. Remove foil and weights when placing the tart back in the oven for a fully-baked shell.
  7. For a savory tart shell, eliminate the sugar.
Adapted from French Tarts by Linda Dannenberg
Sea Sky & Table https://seaskyandtable.com/

Filed Under: Food, Recipes: Sweet Tagged With: crust, food, french cuisine, pies, shell, sweet, tarts

Primary Sidebar

Antarctica is for photographers

https://www.youtube.com/watch?v=weSBhWlnYzQ

Have a group or destination in mind? Contact us.

Sea Sky & Table Webinars

Plan now to travel again.

  • Email
  • Facebook
  • Instagram

Travel Videos

  • Vimeo

Food Videos

  • Vimeo

Search

Categories

Archives

Footer

Connect

Share

  • Facebook
  • Instagram
  • LinkedIn
  • Vimeo

Request a print from the archives at www.mlramos.photography

  • Email

Print, Metal or Acrylic?

Custom framing and mounting by Fine Art America.

Copyright © 2025 · by Shay Bocks · Built on the Genesis Framework · Powered by WordPress